The Sendy integration allows you to connect KleverList with your Sendy installation for seamless synchronization of customer data. Follow the steps below to set up the integration.
| CONFIGURATION ITEMS | DESCRIPTION |
|---|---|
| Sendy API Key | The API Key provided by Sendy. This parameter is Mandatory |
| Sendy Installation Domain | Website in which Sendy is running (example.com). This parameter is Mandatory and Sendy installation must use HTTPS |
| Brand | The Brand you want to use for this integration. Once selected, all the lists under this brand will be loaded. This parameter is Mandatory |
Step 1: Connect to the WordPress Admin area
Once the plugin has been installed and activated, the next step is connecting to your WordPress admin area.
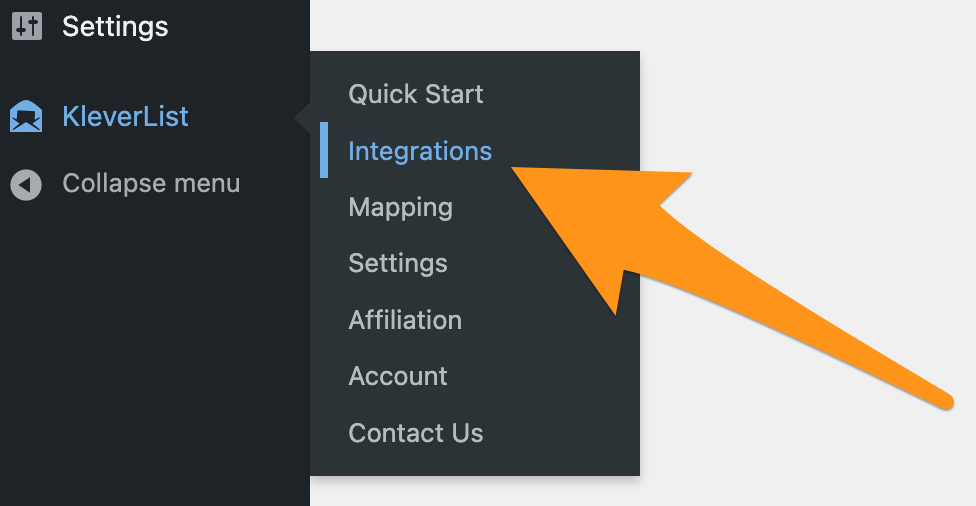
From your WordPress admin area, look for KleverList in the left bar. Then, in the KleverList plugin settings, navigate to the “Integrations” section.
Step 2: Choose the Sendy Integration
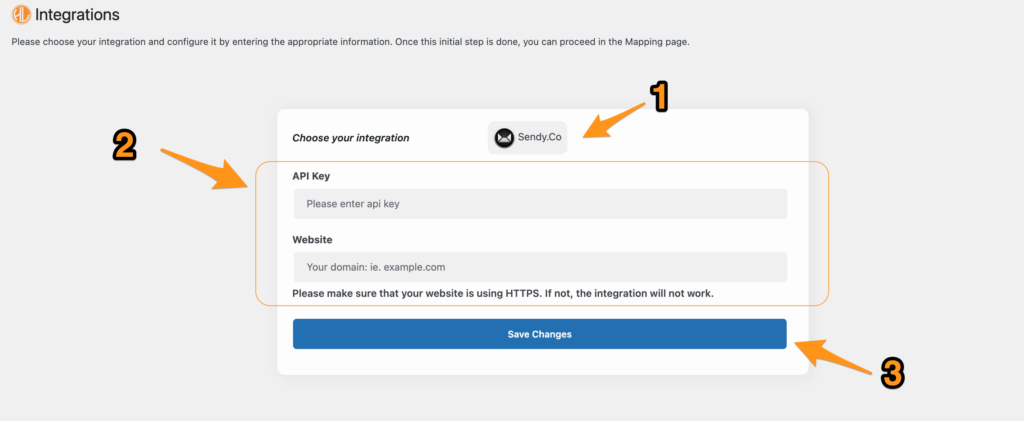
Now, as soon as you click on the “Sendy” icon (1), a new contextual section will appear on the screen (2): you’ll need to enter the Sendy API Key and the domain name.
Enter your Sendy API key and the domain name – such as example.com – where your Sendy installation is running. This information is required to establish the connection between KleverList and Sendy. Finally, confirm by clicking the “Save Changes” button (3).
IMPORTANT NOTE
Step 3: Choose Brand and Load Lists
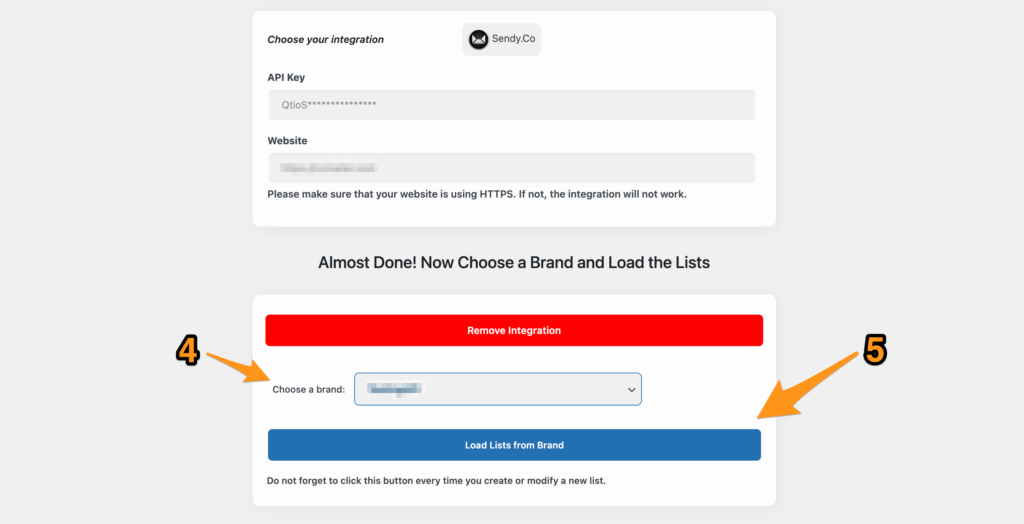
Select the desired brand (4) from your Sendy installation. Once selected, click the “Load Lists” button (5) to retrieve the available lists associated with the chosen brand.
IMPORTANT NOTE
Step 4: Integration Complete
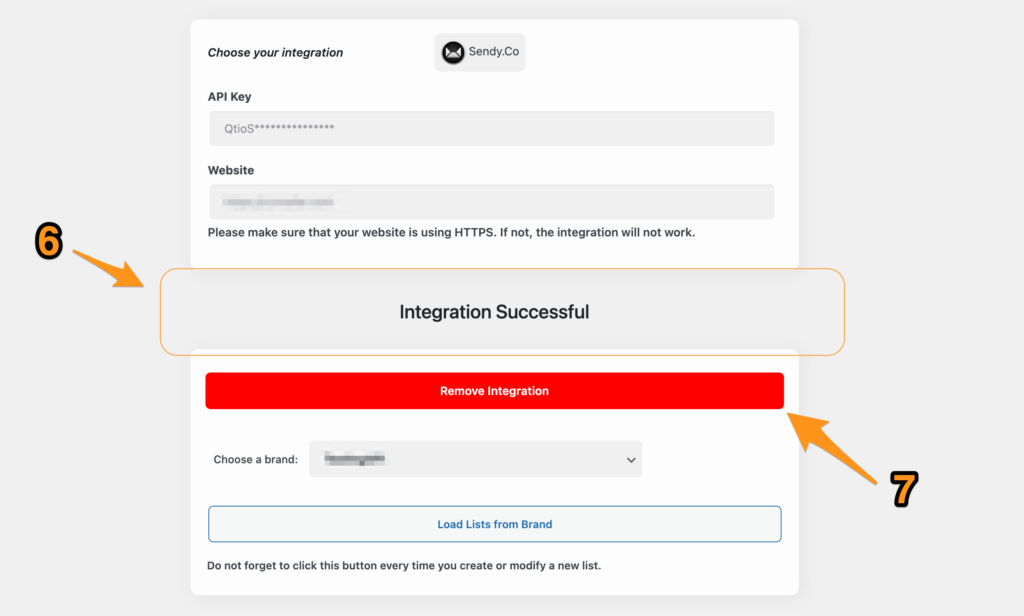
Once the lists are successfully loaded, the message “Integration Successful” will appear on the screen (6), which means that all is set! If you want to remove the integration and the associated information, you need to click the “Remove Integration” button (7).
You can now proceed to the next section, Settings, and start configuring all the KleverList features and options!