
KleverList simplifies the integration of your WooCommerce store with Mailchimp, a robust email marketing platform. This seamless connection ensures that your customer data is effortlessly synchronized, providing a foundation for targeted and effective email campaigns. Follow the steps below to set up the integration.
| CONFIGURATION ITEMS | DESCRIPTION |
|---|---|
| Mailchimp API Key | The API Key provided by Mailchimp. This parameter is Mandatory |
| Mailchimp API URL | The Mailchimp API UTL. This parameter is Mandatory. |
| Audience | The Audience you want to use for this integration. Once selected, your store will be linked to it. This parameter is Mandatory |
Step 1: Connect to the WordPress Admin area
Once the plugin has been installed and activated, the next step is connecting to your WordPress dashboard.
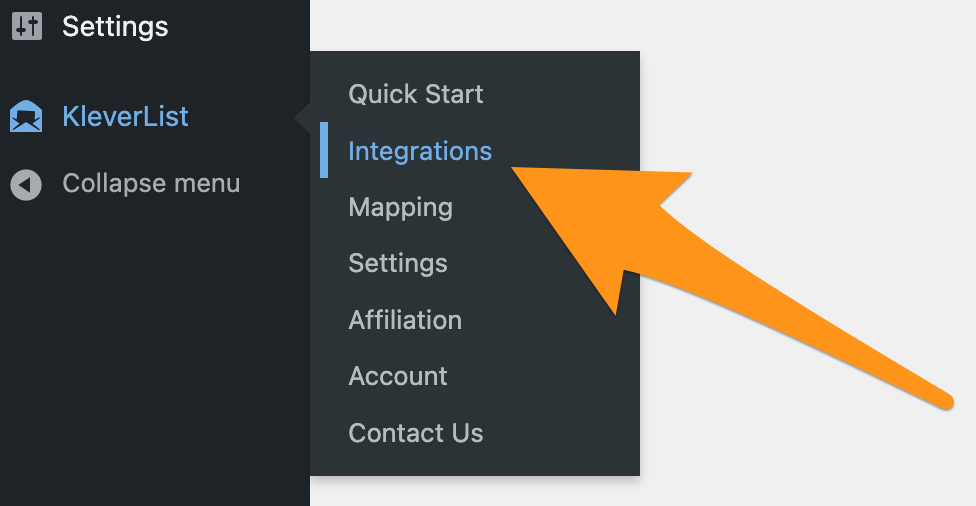
Once logged in, navigate to the KleverList plugin settings by clicking on “KleverList” and selecting “Integrations”.
Step 2: Choose the Mailchimp Integration
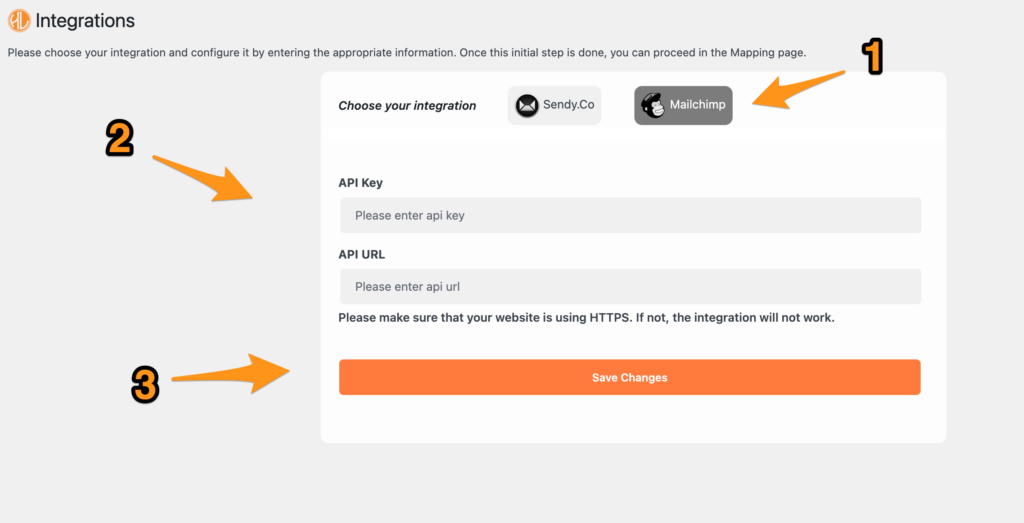
Within the Integration section, you’ll find various options. Select the “Mailchimp” icon (1) to initiate the integration process specifically for Mailchimp.
A new section shows up on the screen (2), requesting you to enter two pieces of information: your Mailchimp API key and the Mailchimp API URL. This is required to establish the connection between KleverList and Mailchimp. Confirm by clicking the “Save Changes” button (3).
IMPORTANT NOTE on API KEY and API URL
The Mailchimp API URL is https://<dc>.api.mailchimp.com/3.0/. The <dc> part of the URL corresponds to the data center for your account, which is also the final part of your API key (-usxx). More information on the official documentation.
Step 3: Choose the Audience
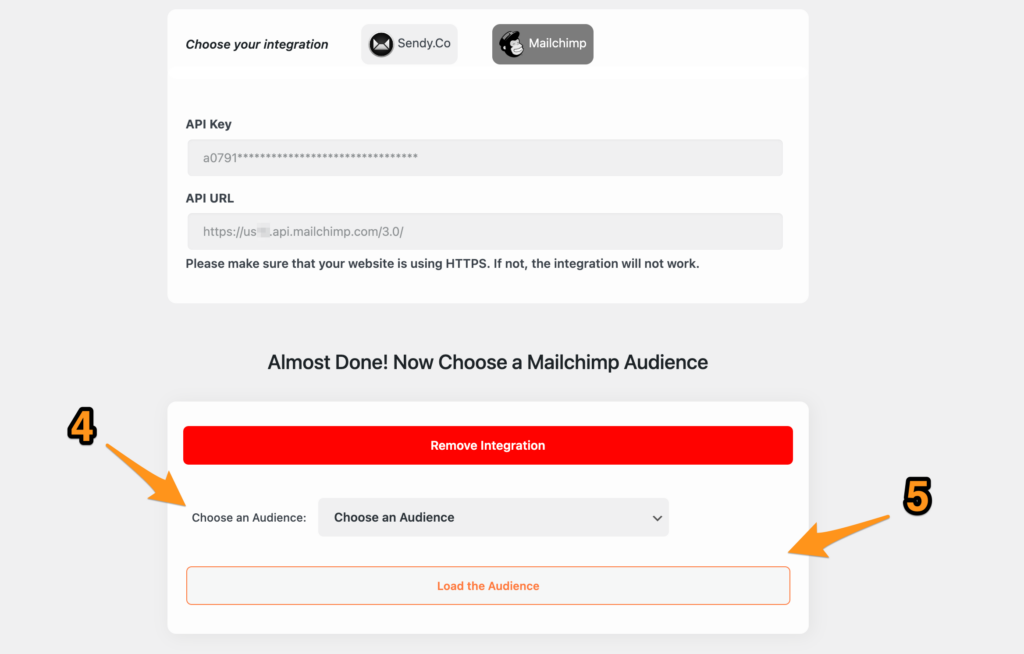
The next step involves choosing the Mailchimp audience you want to link with your WooCommerce store. This ensures that customer information seamlessly flows into the designated audience in your Mailchimp account.
Select the desired Audience (4) from your Mailchimp account. Once selected, click the “Load Audience” button (5) to link your WooCommerce store to the Audience.
Step 4: Integration Complete
Once you’ve chosen the audience, the integration is essentially complete. KleverList will now work in harmony with Mailchimp, ensuring that customer data is accurately and efficiently transferred.
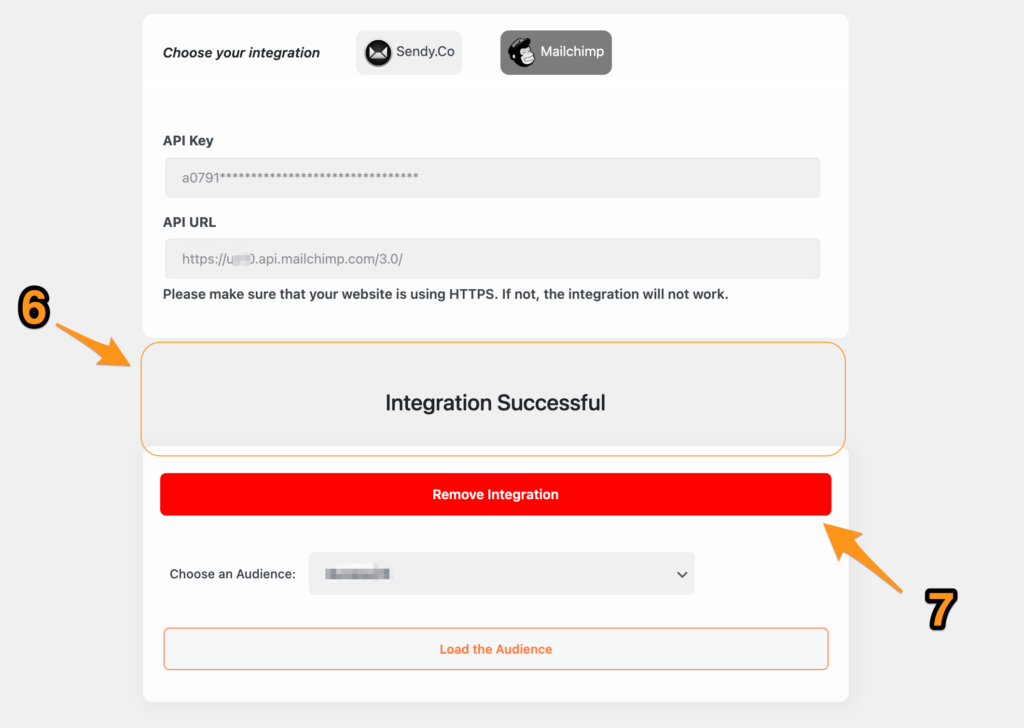
To verify that the integration is successful, check for the message “Integration Successful” (6). If you want to remove the integration and the associated information, you need to click the “Remove Integration” button (7)
These straightforward steps empower you to effortlessly connect your WooCommerce store with Mailchimp, enhancing your marketing strategies and improving customer engagement. You can now proceed with the next step, the Mapping, in which you’ll configure the WooCommerce billing and user fields to map to your Mailchimp Audience.
You can now proceed to the next section, Settings, and start configuring all the KleverList features and options!