KleverList makes it easy to connect your WooCommerce store with AWeber, a leading email marketing platform. This smooth integration automatically syncs your customer data, creating a solid basis for targeted and successful email campaigns. Follow the instructions below to set up the integration.
| CONFIGURATION ITEMS | DESCRIPTION |
|---|---|
| AWeber Login Name / Password | Your AWeber login credentials. This parameter is Mandatory. |
| Authorization Code | The AWeber authorization code is retrievable with the login credentials. This parameter is Mandatory. |
| List | The AWeber list you want to use for this integration. Once selected, your store will be linked to it. This parameter is Mandatory. |
Step 1: Connect to the WordPress Admin area
After installing and activating the plugin, log in to your WordPress dashboard.
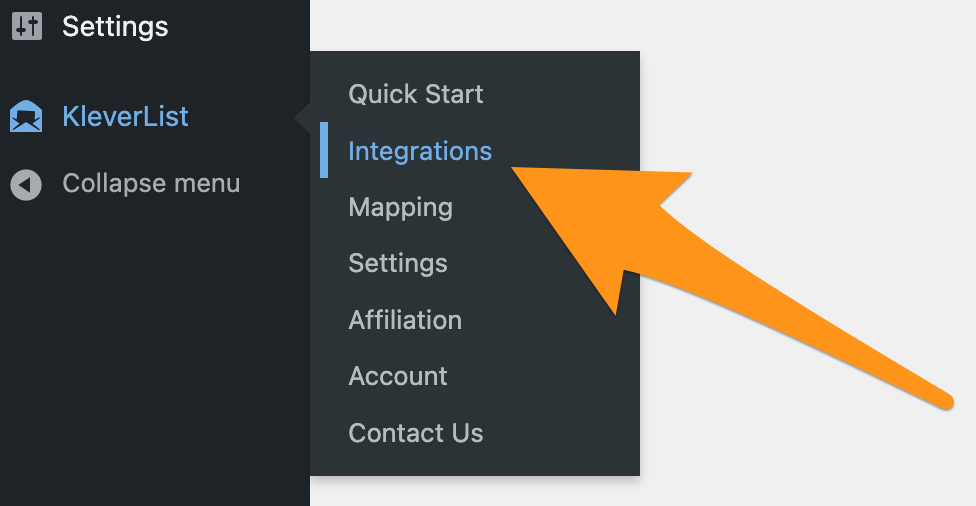
Then, go to the KleverList plugin settings by clicking on ‘KleverList’ and choosing ‘Integrations’.

Step 2: Choose the AWeber Integration
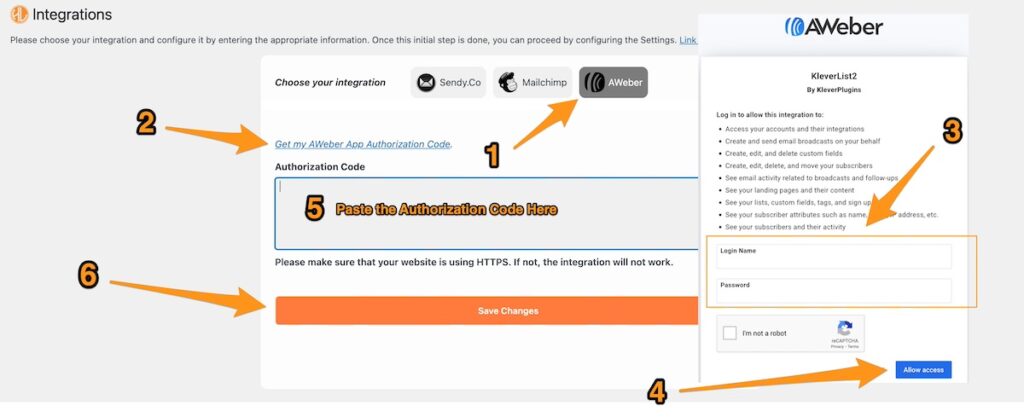
Once the Integration page opens up, you’ll find various options. Choose the “AWeber” icon (1) to start the integration process for AWeber.
A new section shows up on the screen (2), requesting you to retrieve your AWeber App Authorization Code. Click the “Get my AWeber App Authorization Code” link (2), and insert your AWeber Login Name and Password (3). Confirm by clicking the “Allow Access” button (4).
Now, copy the authorization code that shows up on the next screen, close the windows and go back to the KleverList integrations page, paste it in the “Authorization Code” field (5) and click the “Save Changes” button (6).

Step 3: Choose the List
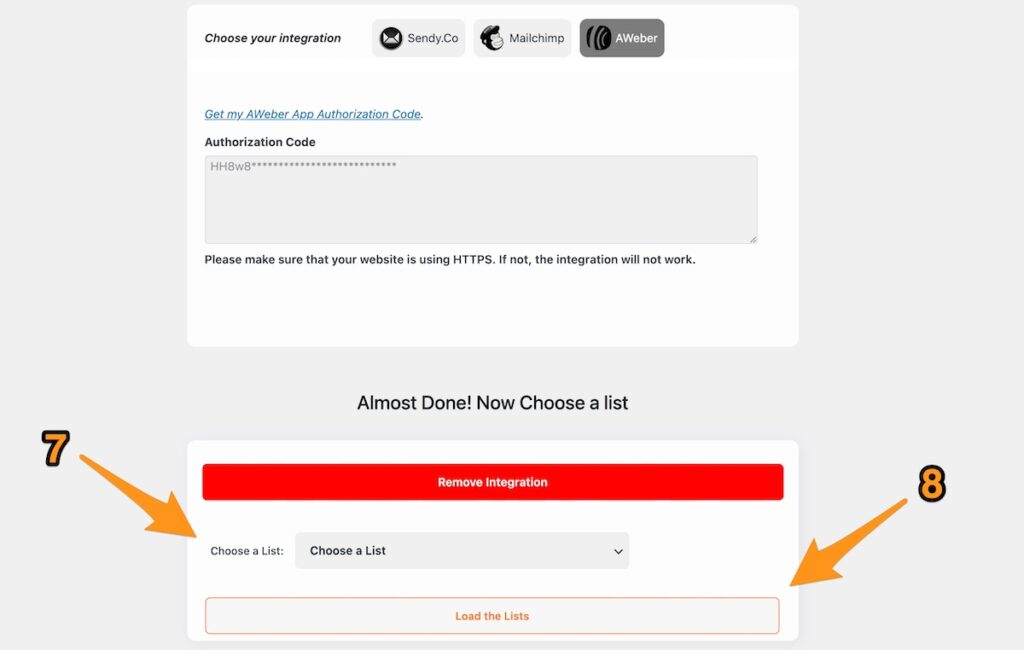
The next step is to select the AWeber list you wish to connect with your WooCommerce store. This will allow customer information to be automatically synced with the chosen list in your AWeber account.
Pick the desired list (7) from your AWeber account and then click the “Load the Lists” button (8) to establish the link between your WooCommerce store and the selected list.

Step 4: Integration Complete
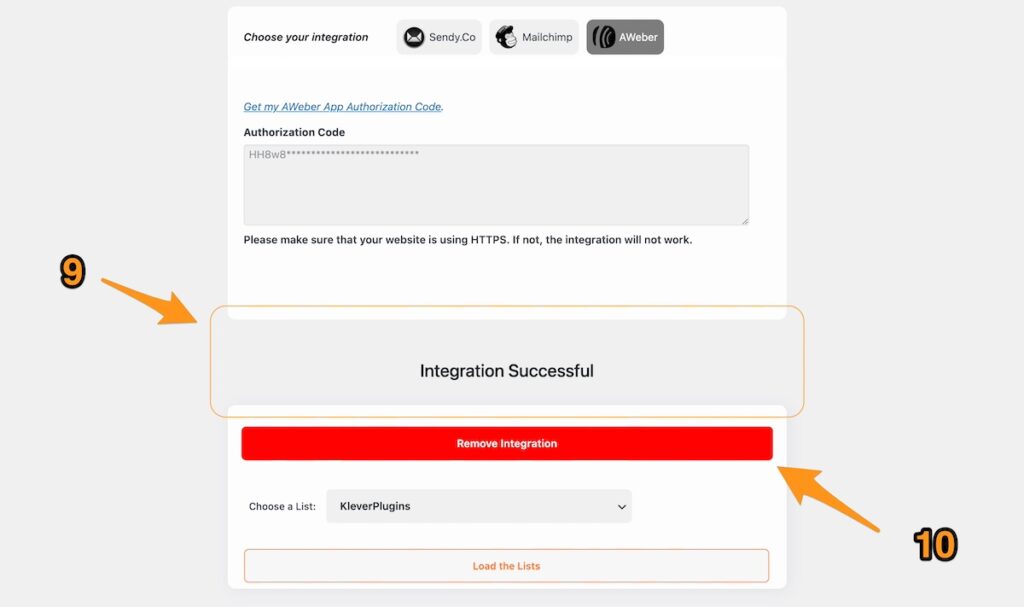
After selecting the audience, the integration is mostly done. KleverList will now seamlessly work with AWever to ensure customer data is transferred accurately and efficiently.
To confirm the integration is successful, look “for the message “Integration Successful” (9). If you need to disconnect and remove the associated data, click the “Remove Integration” button (10).

By following these simple steps, you can easily connect your WooCommerce store with AWeber, boosting your marketing efforts and enhancing customer engagement. Next, move on to the Mapping step, where you’ll set up the WooCommerce billing and user fields to correspond with your AWeber list.
You can then proceed to the Settings section to begin configuring all the features and options that KleverList offers!
