Mapping is a powerful feature in KleverList that allows you to synchronize WooCommerce billing, user, and transaction related information with Sendy. With mapping, you can ensure that customer information is accurately transferred and organized within your email lists. KleverList offers mapping organized into key segmentation categories: demographic, geographic, B2B, behavioral, and transactional. This setup allows for precise targeting by categorizing mapping fields relevant to each segmentation type, streamlining the process of importing and organizing customer data for targeted marketing efforts.
| CONFIGURATION ITEMS | DESCRIPTION | Version |
|---|---|---|
| Demographic Mapping Fields | Essential Mapping Fields + Extra Mapping Fields: Email, Full Name, First Name, Last Name, Username of the customer will be synced on Sendy target lists. Email is the only mandatory field. | Free + PRO Versions |
| Geographic Mapping Fields | Extra Mapping Fields: Billing address fields of your customer will be synchronized on Sendy target lists. All fields are optional | PRO Version |
| B2B Mapping Fields | Extra Mapping Fields: Company Information of your customer | PRO Version |
| Behavioral Mapping Fields | Extra Mapping Fields: These fields are based on customer behavior and interaction with your brand, such as the number of orders initiated. | PRO Version |
| Transactional Mapping Fields | Extra Mapping Fields: All fields related to purchase behavior and spending pattern, such as total revenue and average order value. | PRO Version |
Mapping is a general configuration that applies to all lists in Sendy, rather than a specific list. Once the mapping configuration is completed, we will need to enable it to one or more WooCommerce products. We will have a look at it later.
Step 1: Connect to the WordPress Admin area
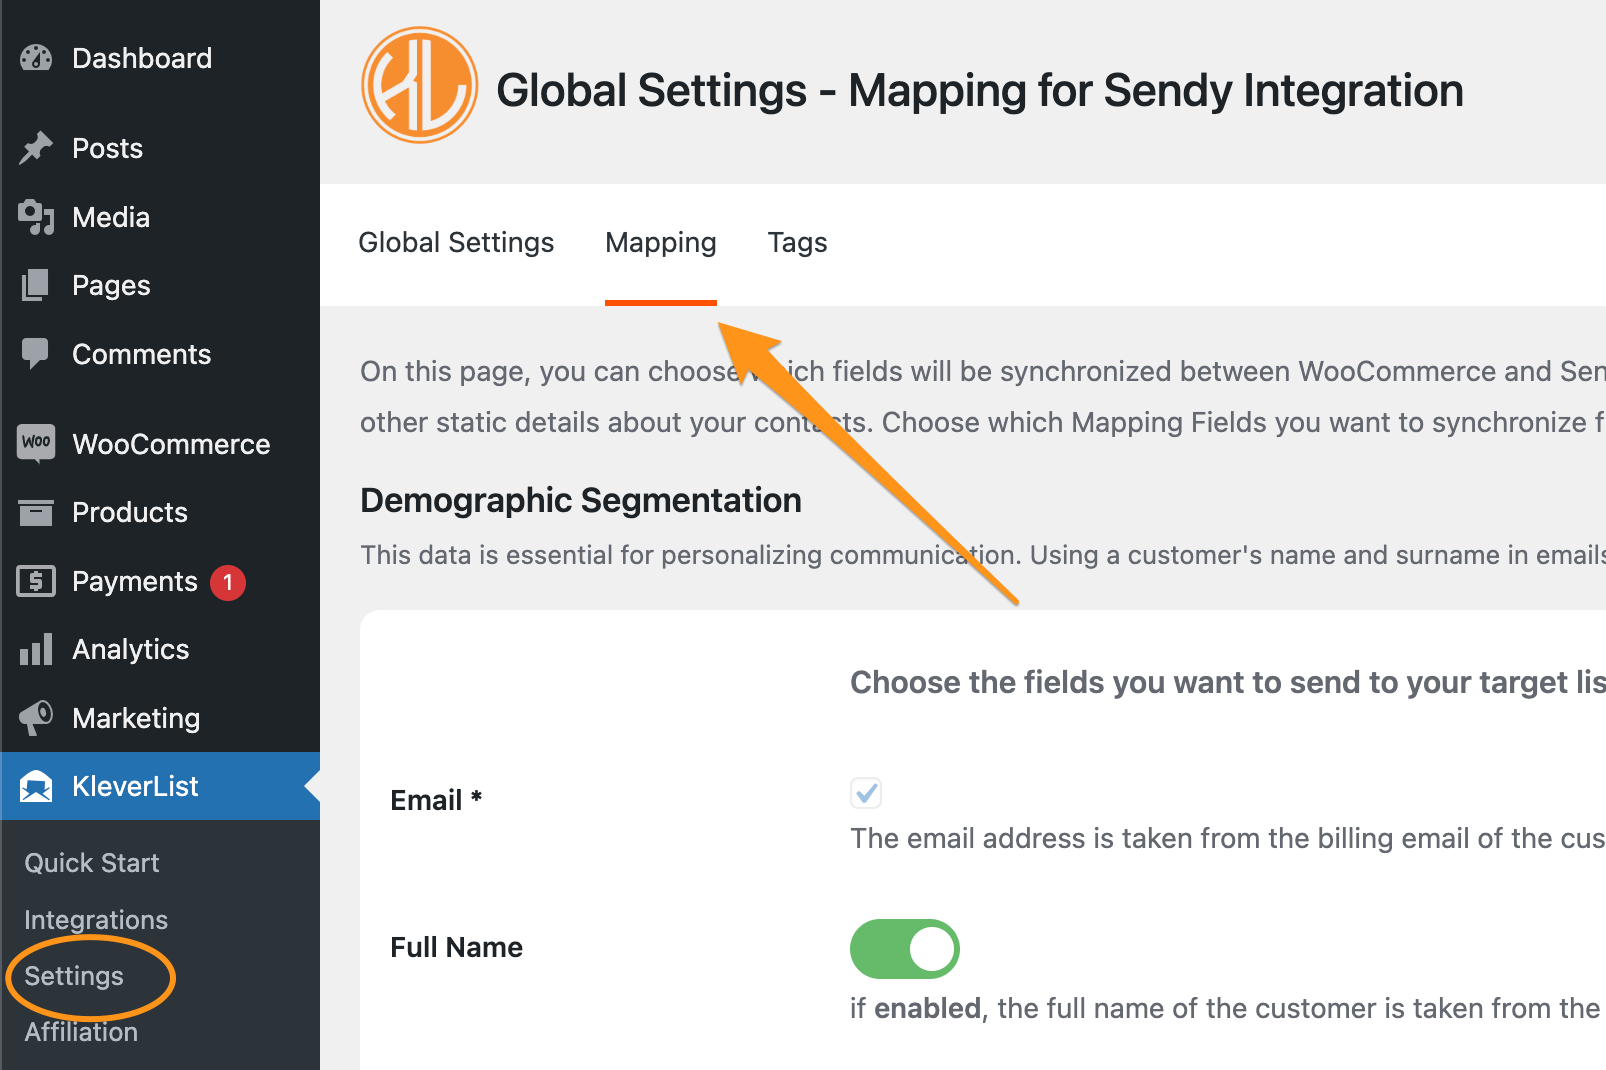
From your WordPress admin area, look for KleverList in the left bar. Then, in the KleverList plugin section, navigate to “Settings”, and select “Mapping” from the top menu.
The Mapping page will now show up. Here, you can select which information you want to synchronize to Sendy.
All the toggles are disabled by default.

Step 2: Configure Essential Mapping
Sendy Integration has two essential mapping fields: email and Full Name.
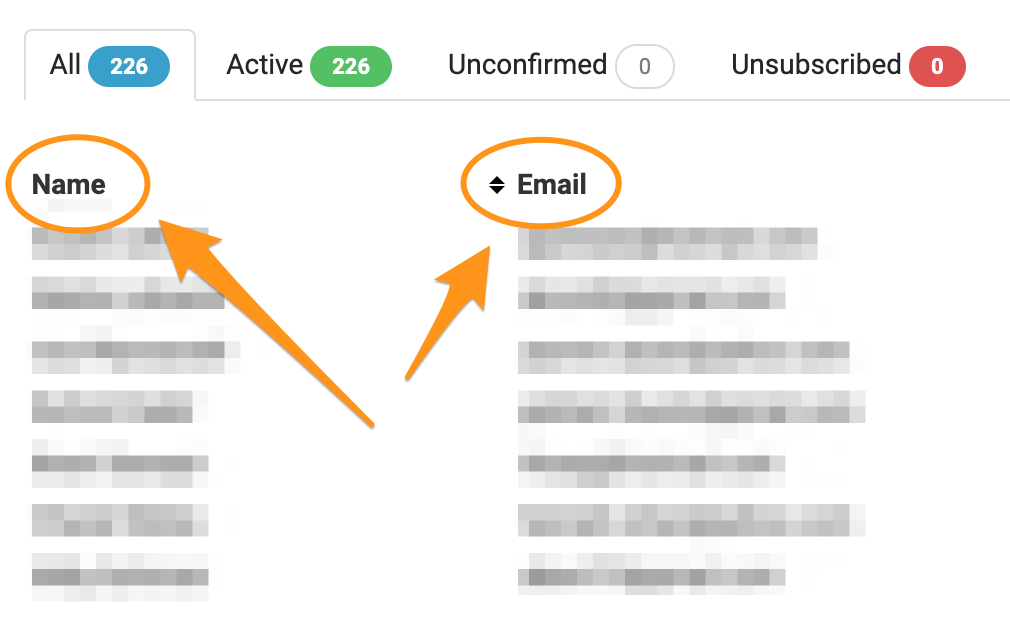
If you go to your Sendy installation and create or open an existing list, you can see that these two fields are already existing by default in your Sendy list(s), as shown in the image.
Therefore is no need to create custom fields for them.

Let’s switch back to the Mapping page on KleverList. The email address (1) – that corresponds to the Email field on Sendy, is enabled by default and cannot be changed. You can choose whether enable or disable the Full Name synchronization (2). If enabled, customer’s first name and last name of your customer will be synchronized in your Sendy target list(s), in the “Name” field.

Scroll the page down to find and configure the Extra Mapping fields.
Step 3: Configure Extra Mapping Fields
In addition to the essential mapping features, the extra Mapping fields allow you to synchronize a wide range of WooCommerce billing and user fields with your email lists. This comprehensive mapping ensures that all relevant customer data, is seamlessly transferred and available in Sendy.
All extra fields (3) can be mapped in addition to the essential mapping fields. You can recognize the extra fields on KleverList because they have a tooltip (?) near the toggle. It’s important to note that extra mapping fields require corresponding custom fields to be created in your Sendy lists.
IMPORTANT NOTE
Therefore, for each Mapping field that belongs to any segmentation category, you are required to create a custom field on Sendy with the exact same name specified when hovering over the ? icon on KleverList (4).

For example, if you want to synchronize the last name of the customer in Sendy, you will need to create a custom field in your Sendy lists named “lastname”, as also explained in the picture above.
If you are unsure about how to create a custom field in Sendy, please refer to this page for detailed instructions.
To save all the settings, please click on the “Save Changes” button located at the bottom of the page.
We have completed the Mapping configuration, and now it’s time to proceed with the next Step and ready to configure the Tags.
